(Maya C++ API) |
|||
uvBlendShape makeCorrShape mirrorMesh drawText skinWeightsIO transferVertices MotionEqualizer |
|||
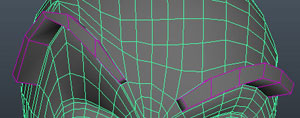
| wrapXDeformer (for Maya 2016/2015/2014 64Bit) | |||
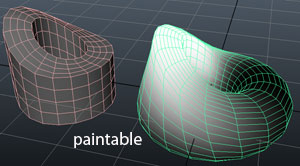
| wrap-Deformer with paintable weights, very fast, adjacent points and weights are calculated only once, when deformer is created and connected | |||
 |
|||
 |
|||
 |
|||
Use like this:
deformer -type wrapX driven;
| |||
|
Download wrapX.rar | |||
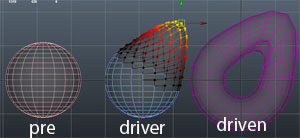
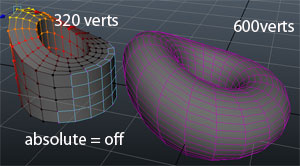
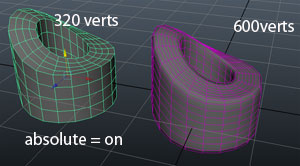
| uvBlendShapeDeformer (for Maya 2015/2016 64Bit) | |||
uv-based BlendShape-Deformer. Topology is irrelevant
|
|||
 |
|||
 |
|||
 |
|||
Use like this:
deformer -type uvBlendShape driven;
| |||
|
Download uvBlendShape.rar | |||
| makeCorrShape (for Maya 2013 64Bit) | |||
| Creates a corrective blendShape based on a sculpted duplicate of the deformed mesh This can be applied as a blendShape at the front of the deformation chain |
|||
 |
|||
Use like this:
| |||
|
Download makeCorrShape.rar | |||
| mirrorMesh (for Maya 2008 32Bit) | |||
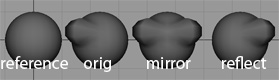
| Mirrors or reflects a mesh at the YZ Plane according to a symmetrical reference mesh. Is a must-have for blendShape-modeling |
|||
 |
|||
mirrorMesh -m 0 -i 1 -t .01;no Flags means tolerance of 0.01 and mirror mode and -X to +X Or source mirrorMeshUI.mel and type mirrorMeshUI. | |||
|
Download mirrorMesh.rar | |||
| drawText (for Maya 2008 32Bit) | |||
| Alternative to Annotation Node with a couple more options Draws text in the Viewport.
| |||
 |
|||
|
Download drawText.mll | |||
| skinWeightsIO (for Maya 2008 Ext.2 32Bit) | |||
| Import/Export of skinCluster-Weights. Writes out ASCII-File Works now also on vertex-selection. Means you can export/import only a certain area of your character.
When you import, it imports only the vertices, that you previously saved to the file.
skinWeightsIO -p "D:/stuff/test.txt" -m 1;Or source skinWeightsIOUI.mel and type skinWeightsIOUI.
It reads the weights by name, not by index. skinWeightsIO is being used by LUMA PICTURES
|
|||
| transferVertices (for Maya 2008 32Bit) | |||
Copies vertex position of the the selected source object to selected destination vertices.
|
|||
|
Both Objects should have the same topology. (Since this tool is mostly used for blendShapes, that'll be the case anyway). Example (setup the scene, two spheres with same topology, one is deformed):
Or source transferVerticesUI.mel and type transferVerticesUI. |
|||
| MotionEqualizer - Revisited | |||
| Here's the PlugIn-Version of Motion Equalizer for Maya 8.5. About 20 times faster!
|
|||
| The Motion-Equalizer is a graphic equalizer for motion. It is displayed like an equalizer in an audioamplifier, where the amplitude (gain) of each frequency band can be individually adjusted via a slider before summing all the bands together again to obtain the final motion. The tool splits the motion signal into five frequency bands, which then can be seperately raised or lowered. This has the effect, that the motion is also splitted into its characteristics. For example, the jitter is mostly to be found in the high frequency bands (band 1 or 2), so it can be eliminated by setting those high frequency bands to zero. Increasing the high frequency band adds a nervous twitch to the movement. It has normally a very low amplitude. Increasing the middle frequencies results in a smoothed but exaggerated motion. Increasing the low frequencies generates an attenuated constrained motion. They have usually the highest amplitude. | |||
 Original-Signal |
|||
 Band 1 |
|||
 Band 2 |
|||
 Band 3 |
|||
 Band 4 |
|||
 Band 5 |
|||
|
|
|||